Table of Contents
Identifying the damage to the skim coat
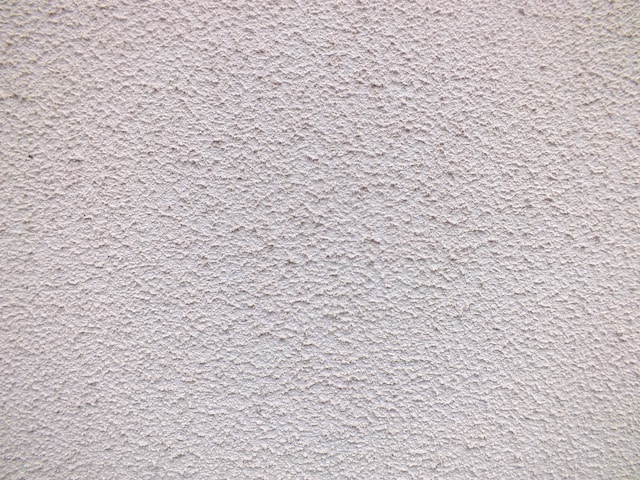
When examining the walls or ceilings of a room, it’s important to be attentive to any irregularities in the skim coat. The skim coat, which serves as a thin layer applied over drywall or other surfaces, can show signs of damage such as cracks, peeling, or uneven texture. These issues are not only unsightly but can also indicate underlying problems that need to be addressed promptly. By carefully inspecting the skim coat, you can pinpoint areas that require repair and take the necessary steps to restore the surface to its original condition.
Common indicators of damage to the skim coat include visible cracks, flaking or peeling sections, and areas where the texture appears inconsistent with the rest of the surface. It’s essential to run your hand lightly over the skim coat to feel for any rough patches or areas that seem to be detaching from the wall. Additionally, observing the skim coat under different lighting conditions can help reveal imperfections that might not be immediately apparent. By paying attention to these details, you can accurately assess the condition of the skim coat and determine the best course of action for repairing it.
Assessing the extent of the damage
One crucial step in repairing a damaged skim coat is to accurately assess the extent of the damage. This requires a thorough examination of the affected area to determine the severity of the plaster cracks or deterioration. Carefully inspect the surface for any visible signs of flaking, peeling, or unevenness that may indicate underlying issues with the skim coat.
It is essential to identify the areas where the plaster has lost adhesion to the substrate or where there are deep, wide cracks that extend beyond the surface layer. By pinpointing these areas of damage, you can effectively plan for the repair process and ensure that the skim coat is applied to all compromised sections. Remember, a comprehensive assessment of the damage will help you achieve a seamless and durable repair of the skim coat.
Gathering the necessary materials and tools
When preparing to repair damaged skim coat, it’s crucial to gather all the necessary materials and tools beforehand. Items such as a putty knife, drywall sanding sponge, skim coat compound, and a mixing bucket are essential for a successful plaster repair. Additionally, make sure to have a sponge, painter’s tape, and a drop cloth on hand to protect surrounding surfaces during the repair process.
Having the right materials and tools ready will streamline the skim coat repair process and ensure a more efficient and effective outcome. Properly preparing and organizing your workspace with all the needed items will help you tackle the task with confidence and precision. By being well-equipped, you can proceed with the repair process smoothly and achieve a seamless blend with the surrounding surface once the plaster repair is completed.
Preparing the damaged area for repair
Before you begin repairing the damaged skim coat, it is vital to properly prepare the affected area. Start by cleaning the damaged surface thoroughly, removing any dirt, debris, or loose particles. Use a damp cloth or sponge to wipe down the area and ensure it is free from any contaminants that could affect the adhesion of the skim coat compound. Additionally, inspect the damaged area for any underlying issues that may have caused the damage, such as water leaks or structural issues. Addressing these underlying problems will help prevent future damage to the skim coat.
Next, assess the extent of the damage to determine the scope of the repair needed. Use a putty knife or a similar tool to gently scrape away any loose or flaking skim coat around the damaged area. This will create a smooth and even surface for the new skim coat to adhere to. Take note of any cracks, chips, or uneven areas that may require additional attention during the repair process. By thoroughly preparing the damaged area, you will ensure a successful and long-lasting skim coat repair.
Mixing the skim coat compound
To properly mix the skim coat compound, you will need to follow the manufacturer’s instructions carefully. Start by pouring the appropriate amount of water into a clean mixing bucket. Then slowly add the skim coat powder while continuously stirring with a mixing paddle. Make sure to mix the compound thoroughly until it reaches a smooth and lump-free consistency.
It is crucial to pay close attention to the mixing ratios specified by the manufacturer to ensure the skim coat compound achieves the desired texture and performance. Adding too much water can result in a runny mixture that lacks adhesion, while too little water can make the compound difficult to work with. The goal is to achieve a creamy consistency that is easy to spread onto the damaged surface for a seamless repair.
Applying the skim coat to the damaged area
To effectively apply the skim coat to the damaged area, start by using a trowel to scoop up a generous amount of the prepared skim coat compound. Holding the trowel at a slight angle, gently spread the compound onto the damaged surface in a smooth and even layer. Ensure that the skim coat fills in any cracks or imperfections, aiming for a uniform thickness across the entire area. Work methodically to cover the damaged section completely with the skim coat, taking care to blend the edges seamlessly with the surrounding surface.
Next, use a long, smooth stroke with the trowel to level the skim coat and remove any excess compound. Keep your movements fluid and consistent to achieve a uniform finish. It’s essential to maintain a steady hand and apply just the right amount of pressure to create a smooth and professional-looking surface. Allow the skim coat to dry thoroughly before moving on to the next steps in the repair process, ensuring that it sets properly for a seamless and durable finish.
Smoothing out the skim coat
To achieve a smooth finish on the repaired surface, gently glide a clean trowel over the freshly applied skim coat. Use long, sweeping motions in a consistent manner to ensure an even distribution of the compound. Pay close attention to any areas that may require additional smoothing, such as edges or corners. The goal is to create a seamless transition between the repair area and the surrounding surface, blending them together effortlessly.
Once you have smoothed out the skim coat to your satisfaction, step back and assess the overall appearance of the repaired area. Look for any imperfections or uneven patches that may require further attention. If needed, you can lightly sand down any rough spots before applying a second coat of skim coat to achieve a flawless finish. Remember, patience and attention to detail are key in achieving a professional-looking repair job.
• Gently glide a clean trowel over the freshly applied skim coat
• Use long, sweeping motions for even distribution of compound
• Pay close attention to edges and corners for additional smoothing
• Create seamless transition between repair area and surrounding surface
Once the skim coat has been smoothed out, take a step back and evaluate the overall appearance of the repaired area. Look for any imperfections or uneven patches that may need further attention. If necessary, lightly sand down rough spots before applying a second coat of skim coat for a flawless finish. Remember that patience and attention to detail are crucial in achieving a professional-looking repair job.
Allowing the skim coat to dry properly
After applying the skim coat to the damaged area, it is crucial to allow it to dry properly before proceeding with any further steps. Proper drying time ensures that the skim coat sets and adheres to the surface securely, providing a strong and long-lasting repair. Depending on the specific skim coat product used, drying times may vary, so it is essential to refer to the manufacturer’s instructions for guidance on the recommended drying duration.
Adequate ventilation and moderate temperatures can help facilitate the drying process of the skim coat. Avoiding high humidity levels and direct sunlight exposure can prevent the skim coat from drying too quickly or unevenly, which may compromise the repair quality. Patience is key during this stage, as rushing the drying process can lead to imperfections in the skim coat finish.
Sanding down the skim coat
Once the skim coat has dried properly, the next step in the repair process is sanding down the surface. Using fine-grit sandpaper, gently sand the skim coat in circular motions to achieve a smooth and even finish. Be cautious not to sand too aggressively, as this can remove too much of the skim coat and affect the final result. The aim is to blend the repaired area seamlessly with the surrounding surface, creating a cohesive and polished appearance.
After sanding down the skim coat, inspect the area closely to ensure that it is level and free of any imperfections. If needed, you can apply a second coat of skim coat to fill in any remaining gaps or uneven areas before proceeding to the next step. Taking the time to sand down the skim coat properly is crucial for achieving a professional-looking repair that seamlessly integrates with the rest of the surface.
Applying a second coat if necessary
To determine if a second coat is needed, carefully inspect the repaired area once the first skim coat has dried. Look for any remaining imperfections such as uneven texture or visible damage. If any discrepancies are still noticeable, it may be necessary to apply a second coat for a seamless finish. Remember to follow the same preparation and application steps as before, ensuring that the surface is clean and free of debris before proceeding with another layer of skim coat.
Applying a second coat can help to achieve a smoother and more uniform surface, especially if the damage was extensive or deep. By adding another layer of skim coat, you can fill in any remaining gaps and create a more robust repair. Take care to blend the second coat seamlessly with the first coat to avoid any visible seams or uneven patches. Remember to allow sufficient drying time between coats to ensure each layer sets properly before proceeding with additional applications.
Ensuring a seamless blend with the surrounding surface
Achieving a seamless blend with the surrounding surface is crucial for a successful skim coat repair job. To ensure a cohesive finish, take extra care during the application process. Make sure the edges of the skim coat are feathered out smoothly to prevent any visible transition lines. Additionally, blend the skim coat into the existing surface using gentle strokes to create a seamless integration with the surrounding area. By taking these meticulous steps, you can achieve a professional and flawless repair that seamlessly merges with the rest of the wall or ceiling.
Furthermore, after applying the skim coat, step back and assess the overall appearance of the repaired area. Look for any inconsistencies in texture or color that may indicate a lack of blending with the surrounding surface. If needed, make any necessary touch-ups to ensure that the repaired area seamlessly integrates with its surroundings. Paying attention to these details will help you achieve a harmonious and cohesive finish that camouflages the repaired section seamlessly into the rest of the wall or ceiling.
Painting or finishing the repaired area
Once the skim coat repair has fully dried, it is time to paint or finish the surface to seamlessly blend it with the surrounding area. Choose a paint color that matches the existing wall color or finish to ensure a cohesive look. Apply the paint evenly over the repaired area using a paintbrush or roller for a professional finish. Allow the paint to dry completely before assessing if additional coats are needed for full coverage. Ensure that the repaired area blends seamlessly with the rest of the wall for a polished appearance.
Alternatively, if the surrounding area has a textured finish, mimic the texture on the repaired section for a cohesive look. Use a texture spray or a textured roller to recreate the same pattern on the repaired area, ensuring that it matches the surrounding surface. Once the texture has been applied, allow it to dry thoroughly before painting over it to match the wall color. Ensure that the repaired area is indistinguishable from the rest of the wall to achieve a flawless finish.
Maintaining and caring for the repaired skim coat area
To ensure the longevity of the repaired skim coat area, regular maintenance is essential. Inspect the repaired area periodically for any signs of wear and tear. If you notice any cracks or chips forming, address them promptly to prevent further damage. Additionally, avoid placing heavy objects directly on the skim coat surface to prevent indentations or scratches. Implementing these simple maintenance practices can help preserve the integrity of the repaired skim coat area for an extended period.
Furthermore, caring for the repaired skim coat area involves using gentle cleaning methods to prevent damage. When cleaning the surface, opt for mild detergents and soft cloths to avoid scratching or wearing down the skim coat. Avoid using abrasive cleaners or rough scouring pads that can degrade the finish of the skim coat. By adopting these cautious cleaning techniques, you can maintain the appearance and functionality of the repaired skim coat area effectively.


