Table of Contents
Identifying Common Wall Plaster Imperfections
Cracks in wall plaster are a common imperfection that can occur due to various reasons such as settling of the building, temperature fluctuations, or poor application of the plaster itself. These cracks can range from small hairline cracks to larger, more noticeable ones. It is important to identify the type and size of the crack to determine the best repair method to ensure a seamless finish.
Another common imperfection in wall plaster is bubbling or blistering, which can be caused by moisture seeping through the wall or improper drying of the plaster during application. Bubbles can form underneath the surface of the plaster, leading to a distorted and uneven appearance. Proper identification of the cause of bubbling or blistering is essential in order to address the root issue and prevent future damage to the plaster.
Causes of Wall Plaster Damage
Understanding the causes of wall plaster damage is crucial in order to effectively address the issue at hand. One common reason for plaster damage is water infiltration. Moisture seeping into the walls can weaken the plaster, leading to cracking, bubbling, or peeling. Poorly sealed windows, leaking pipes, or inadequate waterproofing can all contribute to this problem. It is essential to identify and repair any sources of water intrusion to prevent further damage to the plaster.
Another prevalent cause of wall plaster damage is structural movement. The natural settling of a building over time or vibrations from nearby construction can result in hairline cracks or even larger fissures in the plaster. In addition, if the wall was not properly prepared before plaster application or if low-quality materials were used, it can lead to premature deterioration of the plaster. By understanding these underlying causes of damage, homeowners and professionals can take appropriate measures to rectify the issues and ensure the long-lasting quality of the wall plaster.
Tools and Materials Needed for Wall Plaster Repair
To effectively repair wall plaster, it is imperative to have the necessary tools and materials readily available. Essential tools include a hammer for removing loose plaster, a putty knife for patching holes, a mixing bucket for preparing plaster, a trowel for applying plaster, and sandpaper for a smooth finish. Additionally, having a dust mask, safety goggles, and work gloves ensures personal protection during the repair process.
When it comes to materials, you will need plaster mix, water for mixing, primer for prepping the surface, and paint for the finishing touch. Mesh tape can be used to reinforce larger cracks, while a bonding agent aids in adhering new plaster to the existing surface. Lastly, for a seamless repair job, it’s advisable to have a texture spray to match the existing wall texture and a sealer to protect the newly repaired plaster. By having all the necessary tools and materials on hand, you can efficiently tackle any wall plaster repair task with confidence and precision.
Preparing the Area for Wall Plaster Repair
When preparing the area for wall plaster repair, the first step is to clear the workspace of any furniture, decorations, or other items that could potentially hinder the repair process. It is essential to create a clean and unobstructed environment to ensure efficient and effective repairs.
Next, protect the surrounding area by laying down drop cloths or plastic sheets to prevent plaster dust and debris from spreading. Mask off adjacent walls, ceilings, and floors with painter’s tape to maintain a neat work area and avoid any accidental damage to surfaces. Taking the time to properly prepare the area will not only facilitate the repair process but also result in a polished and professional finish.
Removing Loose or Damaged Plaster from the Wall
To begin the process of repairing wall plaster, the first crucial step is to carefully remove any loose or damaged plaster from the wall surface. This is essential to ensure a solid foundation for the repair work. Using a putty knife or a scraper, gently chip away at the loose plaster until only firmly adhered sections remain. Take care not to create additional damage to the surrounding areas while removing the loose plaster.
After removing the loose or damaged plaster, thoroughly clean the exposed area to remove any dust, debris, or loose particles. A vacuum cleaner or a damp cloth can be used to ensure that the surface is clean and ready for the next steps of the repair process. It is important to create a clean and smooth base for the new plaster application, promoting adhesion and a seamless finish.
Filling and Patching Holes in the Wall Plaster
After removing loose or damaged plaster from the wall, the next step in repairing wall plaster involves filling and patching any holes present. To fill small holes or cracks, a spackling compound can be used to create a smooth surface. Ensure that the compound is evenly spread and leveled with a putty knife for a seamless finish. For larger holes, a patching compound mixed with plaster or joint compound may be necessary to achieve a strong and durable repair.
When patching holes in wall plaster, it is important to apply the filler material in thin layers, allowing each layer to dry completely before adding the next. This helps prevent shrinkage and cracking in the patched areas, resulting in a more stable and long-lasting repair. Once the holes are filled and patched, the surface should be smoothed out to match the rest of the wall, ensuring a uniform appearance once the repair is complete.
Applying a Base Coat of Plaster to the Wall

When applying a base coat of plaster to the wall, it is crucial to mix the plaster mixture according to the manufacturer’s instructions. Ensure that the consistency is smooth and free of lumps to achieve a seamless application. Using a hawk and trowel, start by scooping up a small amount of plaster onto the hawk and then transferring it onto the trowel for an even application on the wall surface. Work in small sections to maintain control over the thickness and evenness of the plaster coat.
As you apply the base coat of plaster, make sure to press and spread the mixture evenly across the wall surface to fill any voids or imperfections. Use long, sweeping motions to create a consistent layer of plaster that adheres well to the wall. Aim to achieve a uniform thickness for a professional finish that will serve as a solid foundation for the subsequent layers of plaster.
Smoothing and Leveling the Wall Plaster Surface
To achieve a smooth and level wall plaster surface, it is crucial to pay attention to detail and ensure precision in your application. Begin by using a plastering trowel in a firm and consistent manner to spread the plaster evenly across the wall. This will help to fill in any imperfections and create a seamless finish. Take your time to work the plaster into the wall, making sure to maintain an even thickness throughout.
After applying the base coat of plaster, use a straight edge or a plasterer’s darby to level the surface. This tool will help you achieve a uniformly flat and smooth finish by skimming excess plaster and creating a level plane. Work methodically across the wall, checking for any bumps or uneven areas as you go. By meticulously smoothing and leveling the wall plaster surface, you will ensure a professional-looking result that is both aesthetically pleasing and structurally sound.
Drying Time for the Plaster
Once the base coat of plaster has been applied to the damaged wall surface, it is crucial to allow sufficient drying time before proceeding with additional repair steps. Rushing this crucial stage can lead to subpar results and potential future issues with the plastered wall. Proper drying time ensures that the plaster sets and adheres securely to the wall, creating a stable foundation for further layers of repair material.
Depending on the type of plaster used and environmental conditions, drying times can vary. It is recommended to follow the manufacturer’s instructions for drying time guidelines. In general, allowing 24 to 48 hours for the plaster to fully dry before sanding or applying additional coats is advisable. Testing the dryness of the plaster by gently pressing on it with a finger can also help determine if it is ready for the next steps in the repair process. Rushing this phase may compromise the integrity of the repair and result in a less durable finish.
Sanding and Priming the Repaired Wall Plaster
After the repaired wall plaster has dried completely, it is essential to sand the surface to achieve a smooth and even finish. Using fine-grit sandpaper, gently sand the repaired areas until they are level with the surrounding wall. Be careful not to oversand as it can lead to uneven patches or damage the underlying surface. Once the surface is smooth to the touch, wipe away any dust or debris with a damp cloth to prepare it for priming.
Priming the repaired wall plaster is crucial to ensure proper adhesion of the final coat of paint or texture. Choose a high-quality primer suitable for plaster surfaces and apply it evenly using a brush or roller. Allow the primer to dry completely according to the manufacturer’s instructions before proceeding with painting or adding texture to the wall. Proper priming not only enhances the durability of the repaired plaster but also promotes an even and long-lasting finish.
Matching Texture and Color of the Existing Wall Plaster
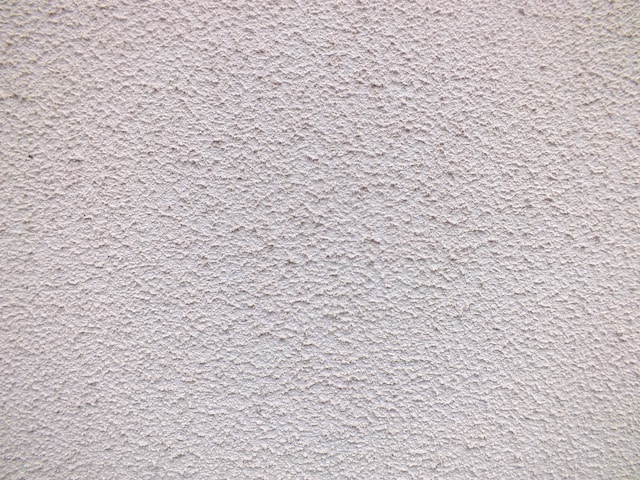
To achieve a seamless finish when repairing wall plaster, it is imperative to match the texture and color of the existing plaster as closely as possible. Start by carefully analyzing the texture of the surrounding wall plaster. Is it smooth, textured, or patterned? This observation will guide you in choosing the right tools and techniques to replicate the texture effectively. Next, select a suitable plaster mix that matches the color of the existing plaster. Mixing in small amounts of tint can help achieve a precise color match. Remember to mix and apply the plaster in small batches to maintain consistency throughout the repair process.
Once you have the texture and color matched, apply the final coat of plaster to blend the repair seamlessly with the surrounding wall. Use the same techniques and tools as before, ensuring a smooth and even application. Pay close attention to the edges of the repaired area, feathering the plaster outwards to avoid visible seams. Allow the final coat to dry completely before sanding and priming the surface for painting. By meticulously matching the texture and color of the existing wall plaster, you can achieve professional-looking results that seamlessly integrate the repaired area into the overall aesthetic of the space.
Applying a Final Coat of Plaster for Seamless Blending
Once the base coat of plaster has dried completely and the surface is smooth and level, it is time to apply the final coat of plaster for seamless blending. This final layer should be thin yet even to achieve a polished finish. Take care to match the texture and color of the existing wall plaster to ensure a cohesive look throughout the repaired area.
Using a hawk and trowel, carefully apply the final coat of plaster in a smooth and consistent manner. Work in small sections to maintain control over the application process and to prevent the plaster from drying too quickly. Blend the edges of the final coat with the surrounding wall surface to create a seamless transition. Allow the final coat to dry completely before proceeding to the next steps in the wall plaster repair process.
Sealing and Protecting the Repaired Wall Plaster
Once the repaired wall plaster has been properly dried, it is essential to seal and protect the surface to ensure its longevity and durability. A high-quality primer should be applied to the repaired area to create a smooth and uniform base for the final coat of paint or plaster. The primer will also help to seal the repaired area, preventing moisture infiltration and enhancing adhesion of the finishing materials.
After the primer has dried completely, a suitable paint or finish can be applied to the repaired wall plaster. It is crucial to choose a paint or finish that is designed for use on plaster surfaces and is compatible with the primer applied. This final coat will not only provide a seamless finish to blend with the surrounding wall but also act as a protective layer against everyday wear and tear. Regular maintenance and periodic inspections of the repaired wall plaster will help in identifying any signs of damage early on, allowing for timely repairs and preventing further deterioration.
Inspecting the Repaired Wall Plaster for Quality
After completing the repair work on your wall plaster, it is crucial to conduct a thorough inspection to ensure the quality and longevity of the repair. Begin by carefully examining the repaired areas for any imperfections such as cracks, air bubbles, or uneven surfaces. Run your hands over the repaired plaster to check for smoothness and consistency in texture. Look closely at the repaired sections from different angles to detect any inconsistencies in color or sheen that may indicate a need for additional touch-ups.
Moreover, inspect the repaired wall plaster for adhesion by applying gentle pressure to the patched areas. Any signs of flaking or separation from the wall surface could indicate improper bonding and may require further attention. Take note of any areas that seem weaker or less solid than the surrounding plaster, as these could be potential areas for future damage. A meticulous inspection at this stage will help identify any deficiencies and allow you to address them promptly, ensuring a high-quality and durable repair job that seamlessly blends with the existing wall plaster.
Maintaining and Preventing Future Wall Plaster Damage
To maintain the integrity of your wall plaster and prevent future damage, regular upkeep is essential. Keep an eye out for any signs of cracks, peeling, or water damage, and address them promptly to avoid more extensive repairs down the line. Simple measures such as fixing small cracks immediately and ensuring proper ventilation in humid areas can go a long way in preserving the quality of your wall plaster.
Additionally, implementing preventive measures can help prolong the lifespan of your wall plaster. Consider using a high-quality paint or sealant to protect the surface from moisture and wear. Routine inspections and maintenance can help catch any issues early on before they escalate into more significant problems, saving you time and money in the long run. By staying proactive and attentive to the condition of your wall plaster, you can maintain its appearance and structural integrity for years to come.


